Engine – Day 6
With the case clean, I could start some other installations.

I always wondered how many of these universal cases actually end up being used for Type 3s given there are so few Type 3s around anymore.
I mean, I get why it is best to make this universal, but it is one of those things I always think about when I have to close this off.

I used aviation sealant to coat the gasket for the Type 3 oil-filler block off. Sometime, if I can mount or hide an oil temp gauge, I’ll replace this with one with a bore and run my oil temp sender from here. It really is an idea place for it and I’ve seen block off plates that are drilled and tapped for the sensor.
Now I put locking nuts on the 2019 New Build’s block off so I need to get 2 for this. I used what I had to just get the plate sealed tightly on the gasket for it all to cure. I’ll replace the nuts later.
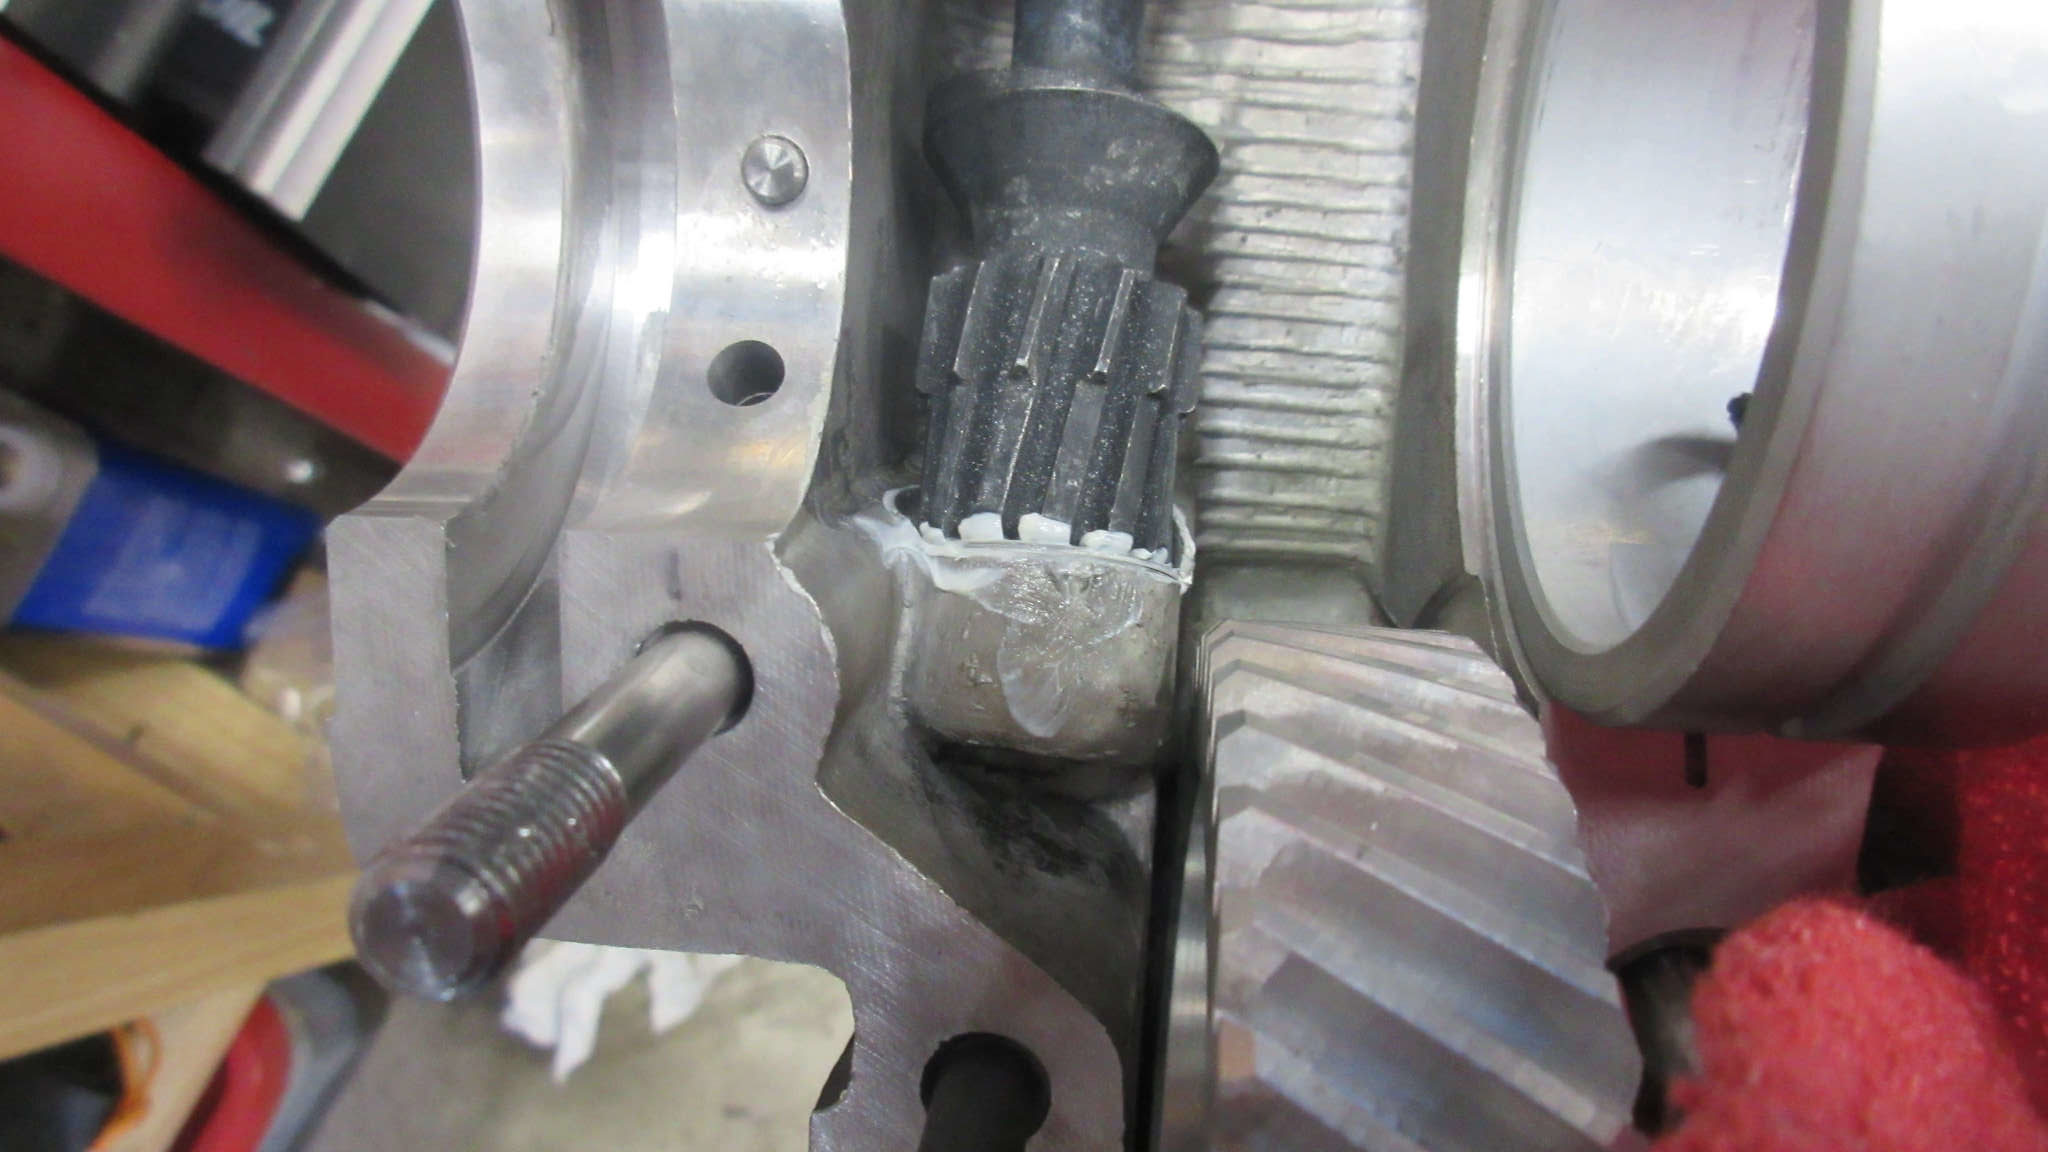
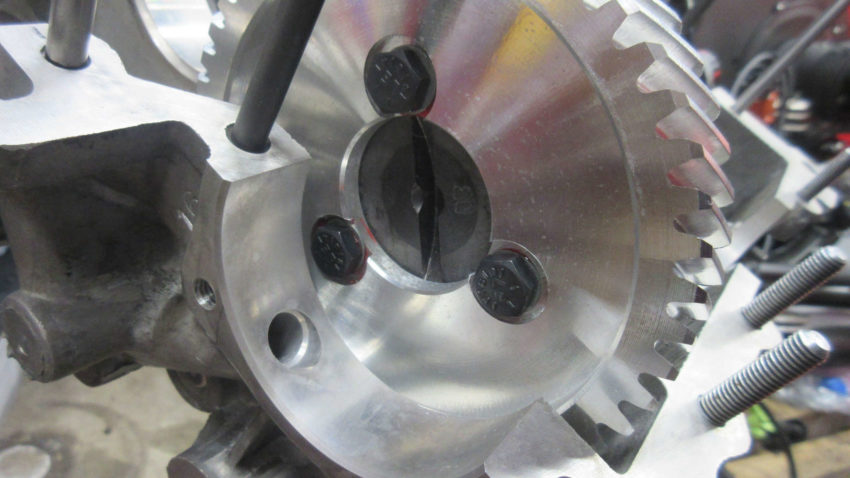
I’m going to do the distributor gear now since I don’t like having trying to get the washers in and down on a sealed case. I’m using lithium grease now to lube this all. It will be coated with assembly lube or motor oil before I seal the case.
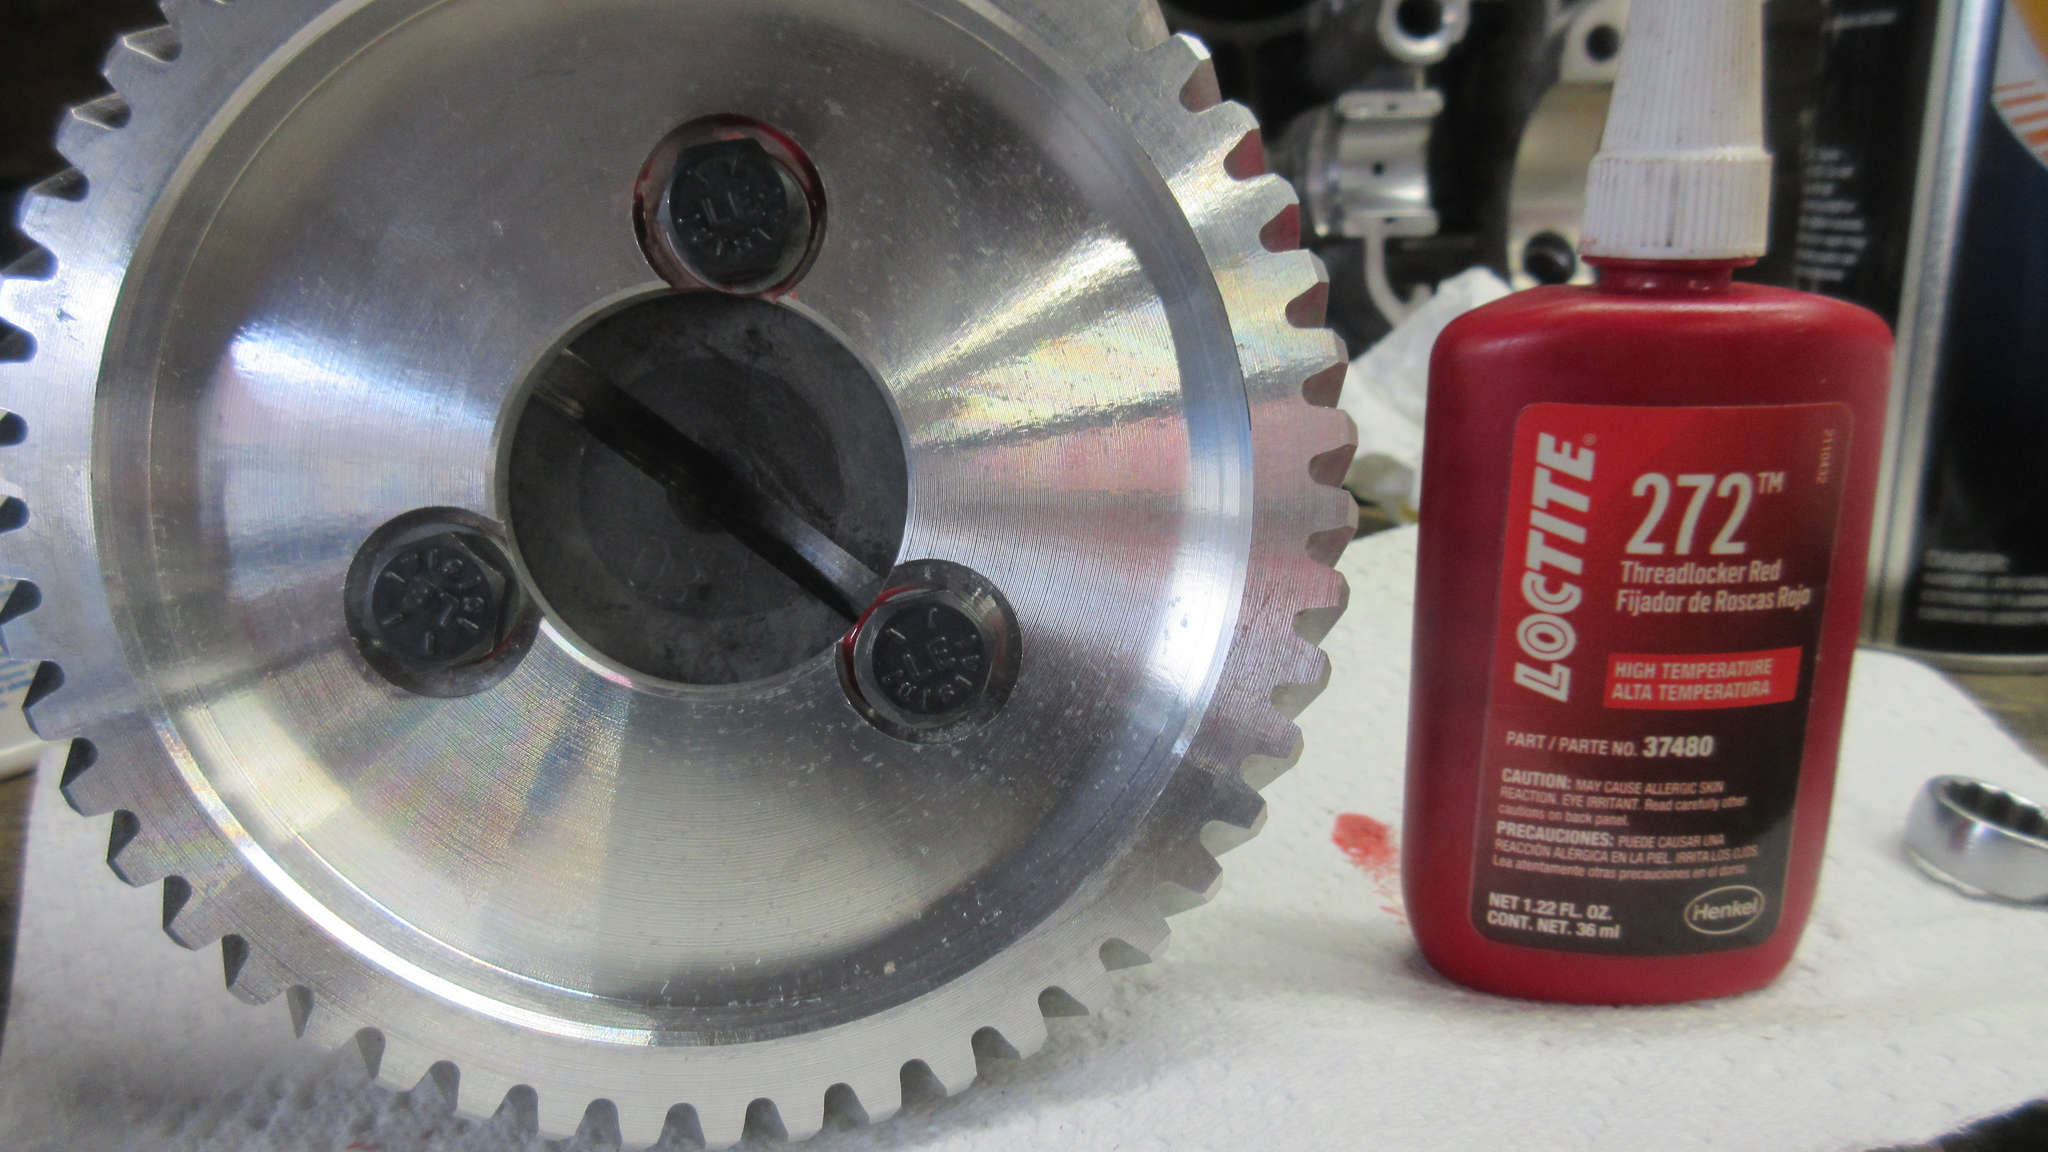
So the cheater cam was assembled but while looking at this pic I realized I did this without making sure the lobes were in the correct orientation. I’m going to have to probably redo this tomorrow. (So many steps to get exactly right and I miss a key timing one!)
There’s a chance I did it right. We’ll see. I also only torqued these to 15 ft-lbs and it should be 18.
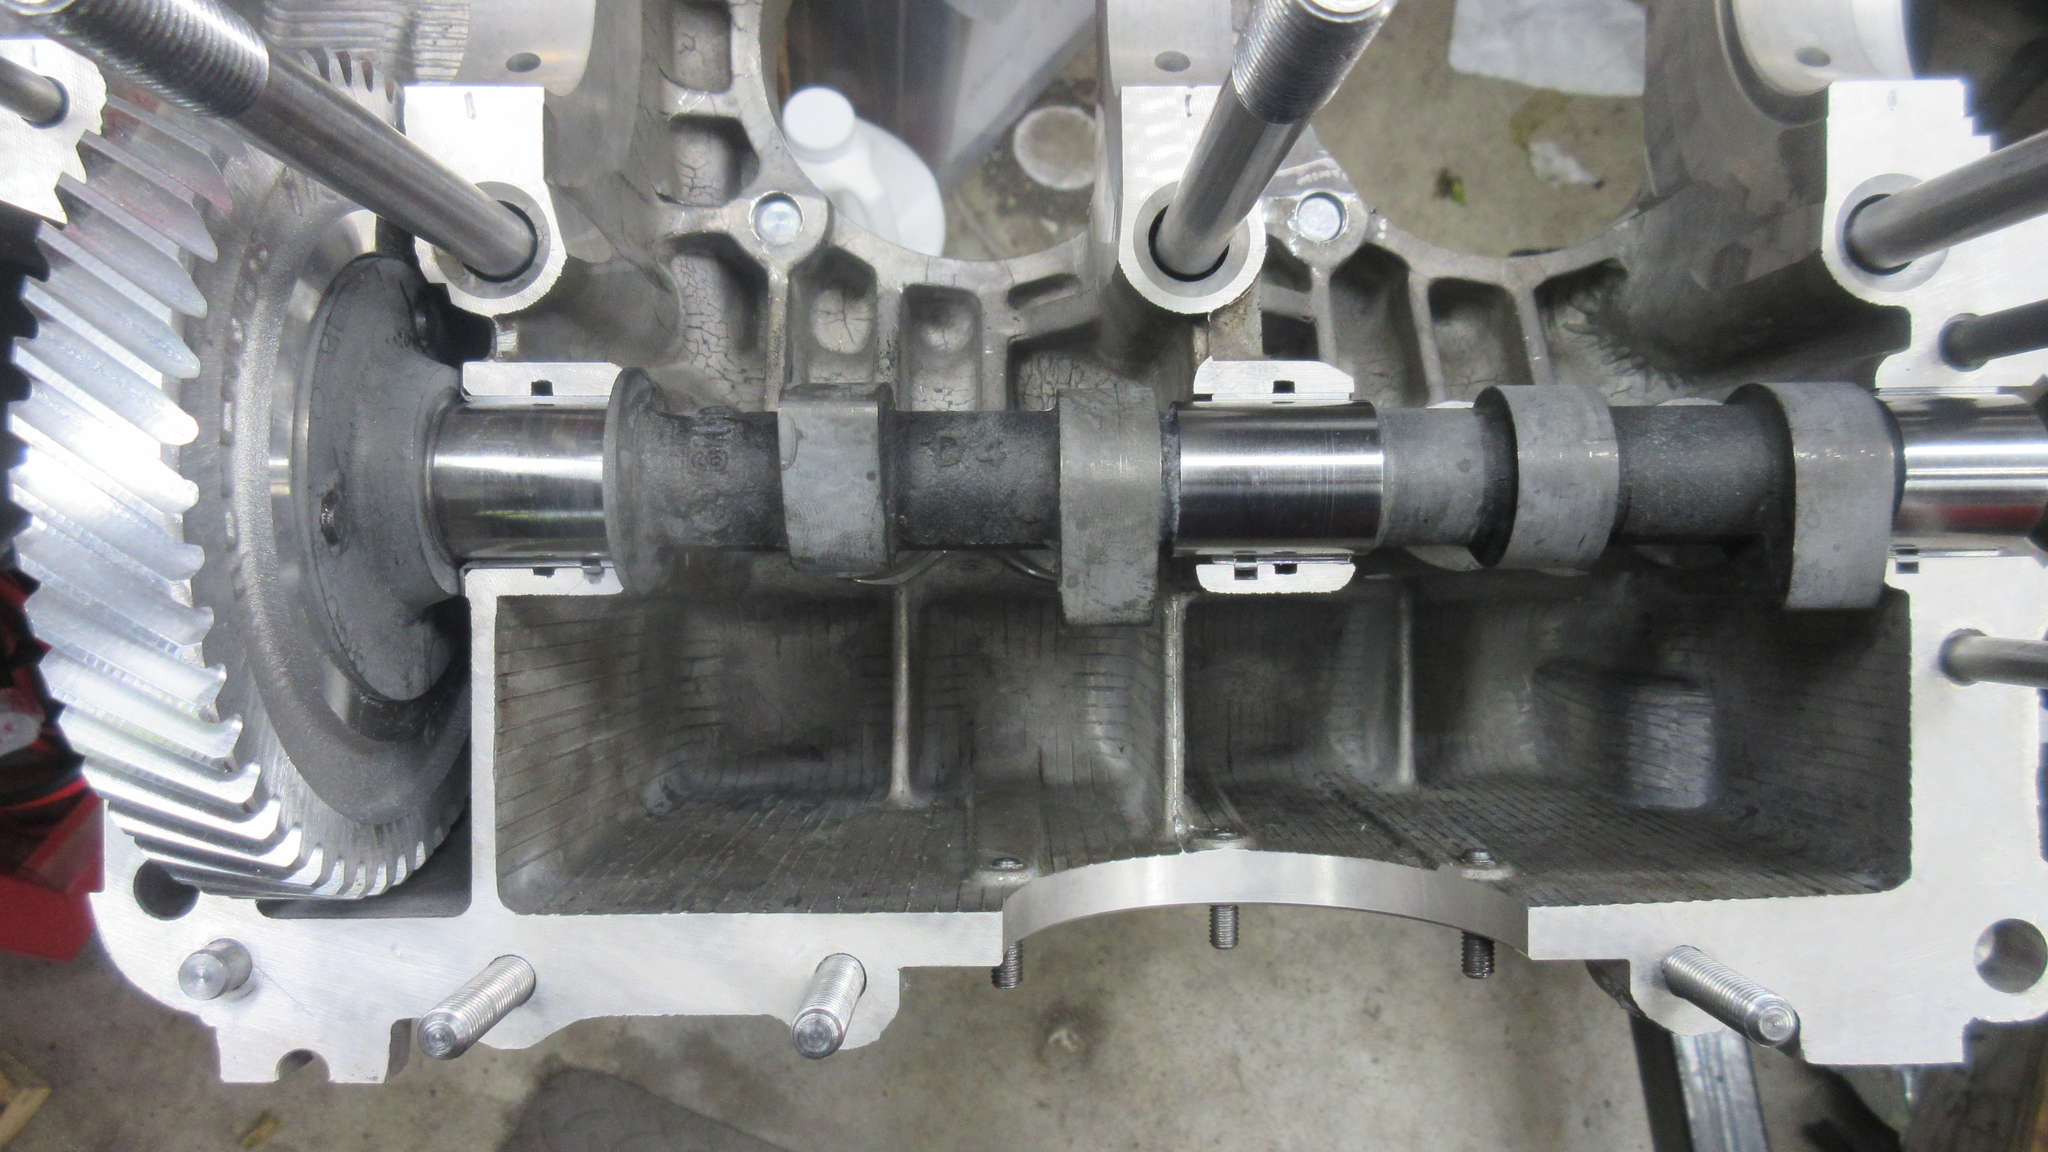
The cam fits well in the bearings and even without lube rotates well. I need to take some thrust measurements but I’m fairly certain this is all good.
I’m debating about pulling all the oil plate studs installing longer ones capped with nylock nuts in all of them. I saw that in a Jbug’s engine building video and I inevitably pull out studs when changing oil. Now of course, that happens with old used cases, but now’s the time to do it for future problems.
1 thought on “Murbella – Day 42 – Cam gear and bearing installation”