I threw out a question to the VW Aircooled Tech Help Group I’m a part of on Facebook to get some input on the risks of introducing any damage to the pivot joint if I brought an impact into the situation.
Since I’ve never seen a trailing arm off a vehicle, I just did not want to risk damage to the threads or anything like that since that would be impossible for me to repair. It wasn’t the threads so much but anything I could risk messing up.
Most agreed there was nothing I could do and several suggested things I’d already done.
So I applied heat for some time and then managed to get the impact wrench to connect via extension. Let’s just say none of the angles are really good with a full size power tool and the angle you really need to get at the bolt with the car on stands.
I was finally able to get the damn thing to budge. I applied more heat and tried to get the torch into the joint as well and sure enough that did the trick and I was able to get the bolt unthreaded.
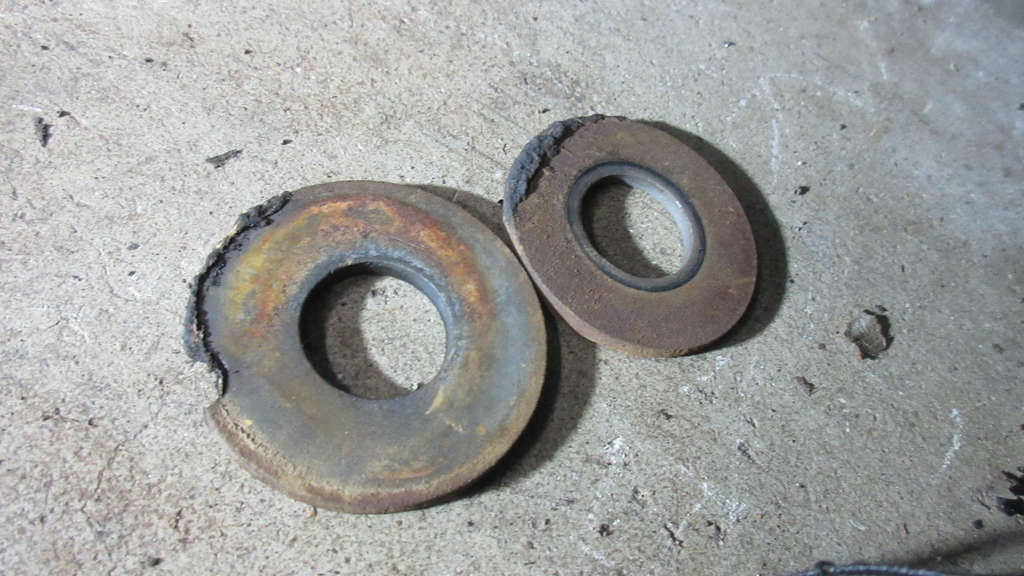
It was only after it was out and I had the 2 washers out that I discovered what the problem probably was.
A previous owner had haphazardly applied an undercoating to everything on Murbella. I’ve been fighting it for years and had to remove a lot of it on the front suspension when I restored that in 2018.
Sure enough, the washers were coated and had essentially seized together, tightening it all up and making it impossible to move. With the propane torch on the joint and washers for so long, some of this uncoating finally got soft and boom… everything came out as it should have.
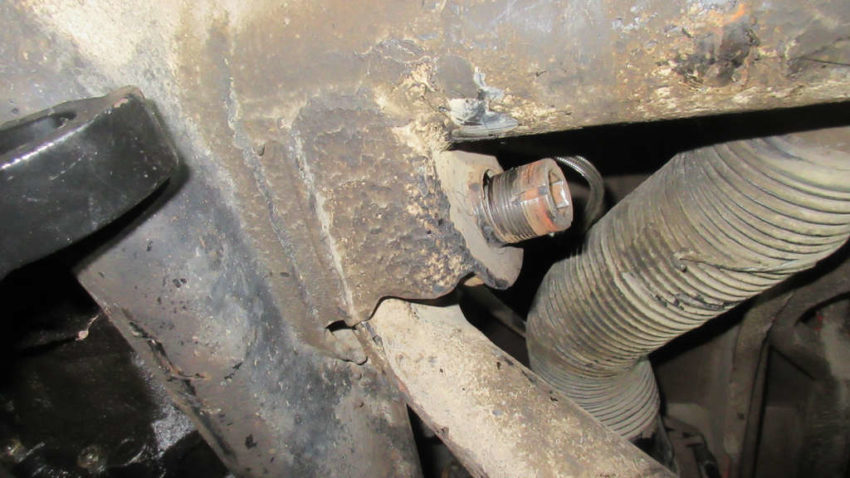
The bolt attached through the mount points into what looks like a threaded bung into the chassis itself right under where the e-brake channels enter the tunnel (above).
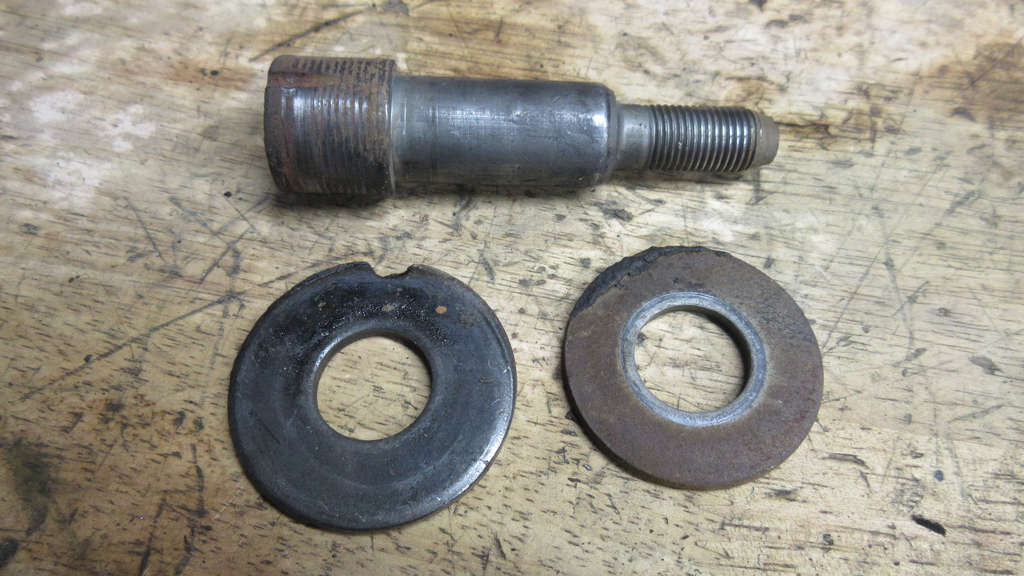
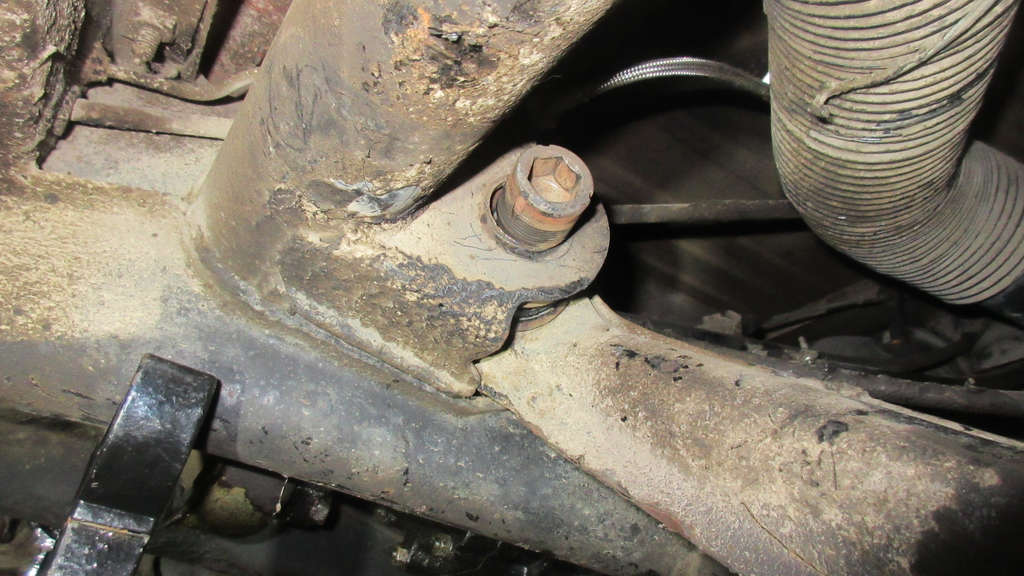
The bolt is in excellent shape with only a bit of surface rust. The washers have seen better days. The one is rusted and of course, there’s the undercoating areas that stuck them together. I need to get new washers as I forgot them with sourcing parts. I did get 2 new bolts but I see no reason to use the new one on this side given the condition.
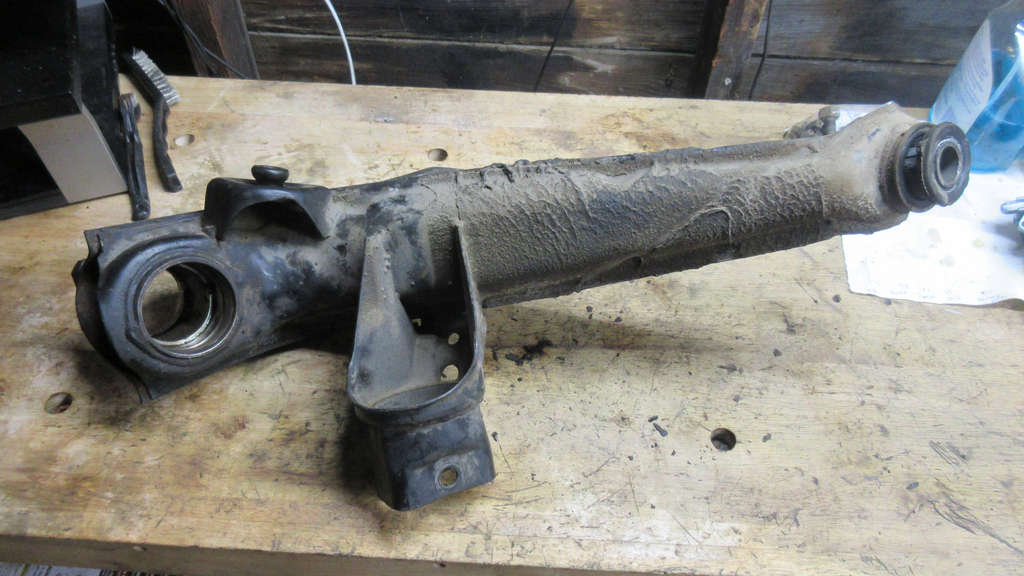
You can really see the undercoating I’m fighting on the trailing arm I removed. This would not have been a part I probably would have coated like this as I would have focused on the floor pans and exposed body/fender parts. I don’t think they really cared since it is so messy.
I’ll be scraping all of this down and prepping everything to get a new coat of a chassis paint or POR15. I still haven’t decided what I’m going to use on these parts yet.

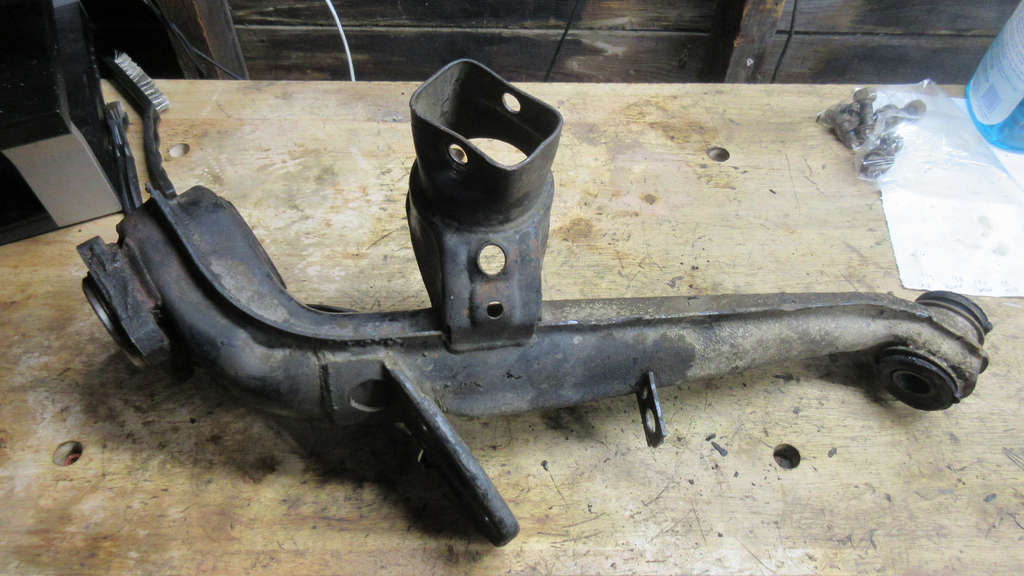
While there is some pitting and dings at the pivot point, I don’t think I’ll need to have anything welded up. I’ll know more after a deep cleaning and surface corrosion removal.
I so wish I had a media blaster but I’m going to have to do this old school.
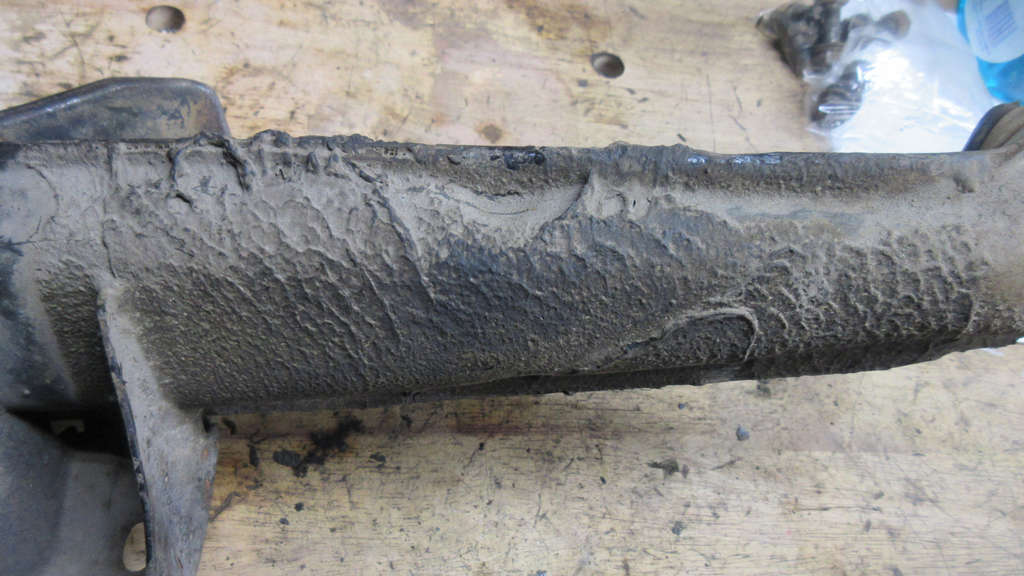
The main shaft of the arm is going to be the real problem. This is going to require a lot of heat and sanding to get this off. I’m not looking forward to this mess.
However, perhaps it will respond well to the mineral spirit bath. I don’t have a way to submerge such a large piece, but we’ll see what I can come up with.
All I can say is that yes, this work definitely needed to be done and I’m glad I am restoring all these parts and replacing all the bushings.
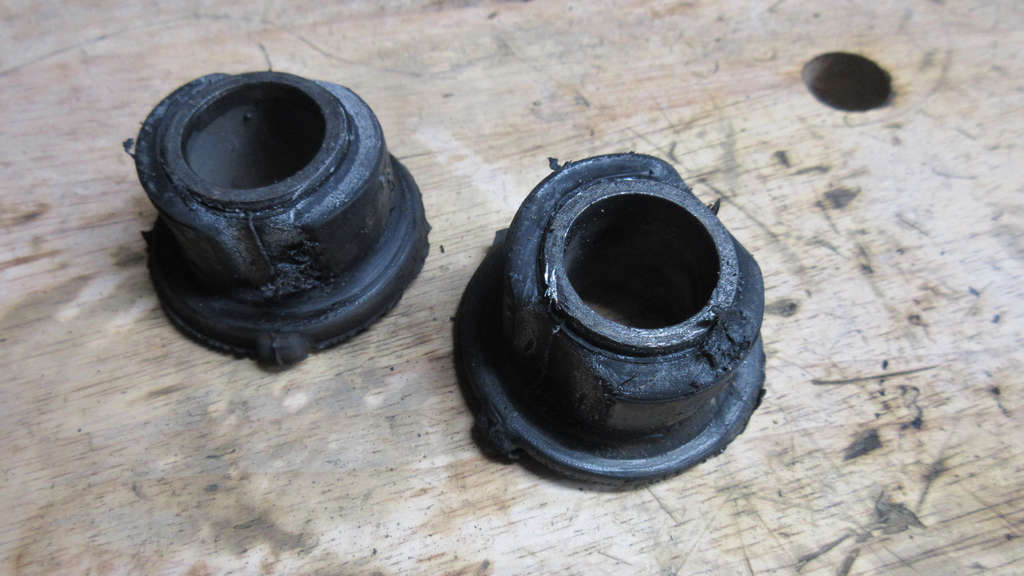
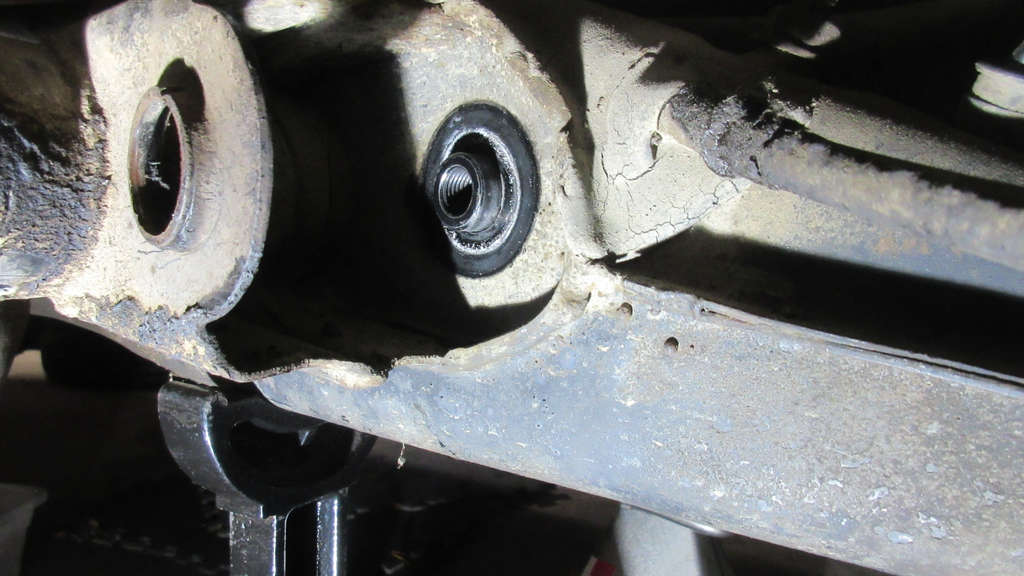
The pivot joint bushings are probably original and 41 years old. They are shot. You can see the degradation along both of them from years of movement. They are also somewhat crushed and deformed.

I feel like I finally accomplished something getting this all disassembled. I was worried about the pivot bolt when it did not easily come out but really, not seeing the joint and how it is assembled, there’s little I could have done to damage it.
The heat is probably what really did the trick when it softened up that undercoating.

Onto the long task of parts clean up and prep.
Now I could disassemble the passenger side, but right now I don’t have enough storage space for it all.
If I can get my son to purge the 1.8T GTI block and some other miscellaneous scrap I may be in luck and have space freed up on the other side.
You’ll need a 17mm hex socket to remove the bolt. It took a bit to get them removed, especially since the car is only on stands and range of motion on break bars is very limited.
With the bolt out, you can push the whole thing down, especially if have removed the shocks and unbolted the arms from the spring plates.
Now my OEM style ones were pretty easy to remove. I managed to get them out by hand, but by the photos you can see the rubber had really crushed and degraded. I’d imagine if they don’t come out by hand, you could push them out with a press (or a vise) or I’ve seen people use heat to melt the rubber enough to push out.
How did you remove the pivot bushing? Tools? Procedure? I am needing to do this for my Karmann Ghia.